Jumaat, 14 Oktober 2011

reinstall grub2 after windows setup

This operation will write to the MBR and restore the modules and core.img to /boot/grub. It will not replace or restore grub.cfg or fix corrupted files.

  1. Boot the LiveCD Desktop.
  2. Open a terminal by selecting Applications, Accessories, Terminal from the menu bar.

  3. Determine the partition with the Ubuntu installation. The fdisk option "-l" is a lowercase "L".

    1. sudo fdisk -l
      If the user isn't sure of the partition, look for one of the appropriate size or formatting.

      Running sudo blkid may provide more information to help locate the proper partition, especially if the partitions are labeled. The device/drive is designated by sdX, with X being the device designation. sda is the first device, sdb is the second, etc. For most users the MBR will be installed to sda, the first drive on their system. The partition is designated by the Y. The first partition is 1, the second is 2. Note the devices and partitions are counted differently.

  4. Mount the partition containing the Ubuntu installation.
    sudo mount /dev/sdXY /mnt

    Example: sudo mount /dev/sda1 Note: If the user has a separate /boot partition, this must be mounted to /mnt/boot Note: If the user has a separate /home partition, this must be mounted to /mnt/home. Encrypted home partitions should work.

  5. Run the grub-install command as described below. This will reinstall the GRUB 2 files on the mounted partition to the proper location and to the MBR of the designated device.

    sudo grub-install --root-directory=/mnt /dev/sdX

    Example: sudo grub-install --root-directory=/mnt /dev/sda


Rabu, 4 Mei 2011

Ubuntu 11.04 - freezes during or after booting the system

If you install Ubuntu on 11.04, or other distros with latest Linux kernel, or if you update to latest kernel (2.6.38 and +), you might experience freezes during or after booting the system. If system boots without freezing, your wired connection is going up and down constantly. This is related to either power management of the PCIe bus bug, BIOS issues or most possibly a driver (JMicron) related bug. The fix for this is to add 'pcie_aspm=off' to your kernel boot options.

On Ubuntu is in the /etc/default/grub file, it should look like this:
GRUB_CMDLINE_LINUX_DEFAULT="quiet splash pcie_aspm=off".

On other systems, find the kernel boot options and add 'pcie_aspm=off' to it. I am guessing that the NP8150 and NP8170 are also susceptible to this problem as well.

Happy Linuxing!

Isnin, 2 Mei 2011

Fedora installation using ISO/Grub2

n an Ubuntu intstallation, I created a directory called iso. I copied the iso into it. I then mounted the iso with -o loop and copied over isolinux/vmlinuz and initrd.img to the same directory containing the iso image. So, in my Ubuntu / partition, I have a directory called iso containing F14.iso, initrd.img and vmlinuz.

I then booted into an old Fedora install (that I was planning to overwrite.) The Ubuntu partition was /dev/sda6. So, I added to the old Fedora grub.conf

title Fedora Boot
root (hd0,5)
kernel (hd0,5)/iso/vmlinuz fromiso=/iso/f14.iso
initrd (hd0,5)/iso/initrd.img

ISO Booting with Grub 2

Need to unmounted the /isodevice,

using sudo umount -l -r -f /isodevice

Jumaat, 29 April 2011

Ubuntu Unity Keyboard Shortcuts


Unity Shortcuts

  • Super (Win key) – This open the activities menu (Launcher)
  • Super+A – Brings up the applications menu and allows you to perform search
  • Super+F1 – Focuses on the Launcher, use arrow keys to navigate and press enter to select
  • Super+W – Expo mode, zoom out on all windows in all workspace and lets you to move them
  • Shift+Alt+ Up - Expo mode for all windows in the current workspace only
  • Super+D – Minimize all windows; hitting it again restores them
  • CTRL+Alt+Left/Right/Up/Down – Change to a new workspace
  • Super+S – Expo mode, zooms out on all the workspaces and let’s you manage windows
  • Super+F - Opens Files & Folders menu

Window Shortcuts

These shortcuts can be used in any environment as well in Unity.

  • Alt+Tab – Switches between currently open windows
  • Alt+F7 – Moves the current window (can be moved with mouse or keyboard)
  • Alt+F8 – Resizes current window (again,can be moved with mouse or keyboard)
  • Alt+F9 – Minimises current window
  • Alt+F10 - Maximises current window
  • Alt+Space – Brings up window menu with various options as minimize, maximize, move…etc
  • Alt+F5 – Returns window to ‘normal’ or previous size
  • Alt+F4 – Closes window

Terminal Shortcuts

You can use these shortcuts when you are using the terminal (Ctrl+Alt+T).

  • Ctrl + A – Move cursor to beginning of line
  • Ctrl + E – Move cursor to end of line
  • Ctrl + C – kills the current process
  • Ctrl + Z – sends the current process to the background
  • Ctrl + D – logs you out
  • Ctrl + R – finds the last command matching the entered letters
  • Enter a letter, followed by Tab + Tab – lists the available commands beginning with those letters
  • Ctrl + U – deletes the current line
  • Ctrl + K – deletes the command from the cursor right
  • Ctrl + W – deletes the word before the cursor
  • Ctrl + L – clears the terminal output
  • Shift + Ctrl + C – copy the highlighted command to the clipboard
  • Shift + Ctrl + V (or Shift + Insert) – pastes the contents of the clipboard
  • Alt + F – moves forward one word
  • Alt + B – moves backward one word
  • Arrow Up/Down – browse command history
  • Shift + PageUp / PageDown – Scroll terminal output

Compiz Shortcuts

Some of these shortcuts requires Compiz Desktop effects enabled.

  • Alt + Tab – switch between open windows
  • Win + Tab – switch between open windows with Shift Switcher or Ring Switcher effect
  • Win + E – Expo, show all workspace
  • Ctrl + Alt + Down – Film Effect
  • Ctrl + Alt + Left mouse button – Rotate Desktop Cube
  • Alt + Shift + Up – Scale Windows
  • Ctrl + Alt + D – Show Desktop (Only in GNOME)
  • Win + Left mouse button – take screenshot on selected area
  • Win + Mousewheel – Zoom In/Out
  • Alt + Mousewheel - Transparent Window
  • Alt + F8 – Resize Window
  • Alt + F7 – Move Window
  • Win + P – Add Helper
  • F9 - show widget layer
  • Shift + F9 – show water effects
  • Win + Shift + Left mouse button – Fire Effects
  • Win + Shift + C – Clear Fire Effects
  • Win + Left mouse button – Annotate: Draw
  • Win + 1 – Start annotation
  • Win + 3 – End annotation
  • Win + S – selects windows for grouping
  • Win + T – Group Windows together
  • Win + U – Ungroup Windows
  • Win + Left/Right – Flip Windows

Nautilus Shortcuts

You might want to remember some these combinations like the one to create new folder or rename a file.

  • Shift + Ctrl + N – Create New Folder
  • Super + T - Opens the Trash can (recycle bin)
  • Alt + Home – Opens Home
  • Ctrl + T – Delete selected file(s) to trash
  • Alt + ENTER – Show File/Folder Properties
  • Ctrl + 1 – Toggle View As Icons
  • Ctrl + 2 – Toggle View As List
  • Shift + Right – Open Directory (Only in List View)
  • Shift + Left – Close Directory (Only in List View)
  • Ctrl + S – Select Pattern
  • F2 – Rename File
  • Ctrl + A – Select all files and folders
  • Ctrl + W – Close Window
  • Ctrl + Shift + W – Close All Nautilus Windows
  • Ctrl + R – Reload Nautilus Window
  • Alt + Up – Open parent directory
  • Alt + Left – Back
  • Alt + Right – Forward
  • Alt + Home – go to Home folder
  • Ctrl + L – go to location bar
  • F9 – Show sidepane
  • Ctrl + H – Show Hidden Files
  • Ctrl + + – Zoom In
  • Ctrl + - – Zoom Out
  • Ctrl + 0 – Normal Size

Common Application Shortcuts

These shortcuts do not apply in all applications, but usually perform the functions listed below.

  • Ctrl + C – Copy the selected text/object
  • Ctrl + X - Cut the selected text/object
  • Ctrl + V – Paste/insert the selected text/object
  • Ctrl + A – Select all text
  • Ctrl + B – Make the selected text bold
  • Ctrl + I – Make the selected text italic
  • Ctrl + U - Underline the selected text
  • Ctrl + N - Open a new document or window
  • Ctrl + S - Save the current document
  • Ctrl + O - Open another document
  • Ctrl + P - Print the current document
  • Ctrl + Z - Undo the last change you made
  • Ctrl + Shift + Z - Redo a change that you just undid
  • Ctrl + Q – Quit the current application

Useful Shortcuts

  • Alt + F2 Run an application by typing its name in the box which appears
  • Prt Sc (Print Screen) Take a screenshot of the whole screen
  • Alt + Prt Sc Take a screenshot of the current window
  • Alt+Ctrl+Del – Restart the system
  • Alt+Ctrl+L - Lock the screen

Mouse Tricks

  • Tiling – Dragging a Window to the left/right border will auto tile it to that side of the screen
  • Maximization – Dragging a window to the top panel will maximize it
  • Unmaximize – Dragging the top panel down on a maximized window will unmaximize it

Khamis, 21 April 2011

Linux - Video Resolution Tools and Command

Useful command line tools

1. xresprobe [driver=vesa,ati,nv,nvidia,i810]
2. ddcprobe

In ubuntu is not install by default. To install apt-get install xresprobe

To check/modify resolution


1. xrandr


more info

http://ubuntuforums.org/showthread.php?t=83973

Isnin, 18 April 2011

Batch resize photo

In Linux, if you have installed ImageMagick suite, you can use a nifty command to resize images, photos or pictures. The name of the command line tool is mogrify. Here is how it is done.

Suppose you want to resize all your images to a size of 800×600.

You open a terminal and navigate to the directory containing your images, photos or pictures.

Create a directory in the location named “resized-pictures” as follows :

$ mkdir resized-pictures

Now run the mogrify command from the same location.

$ mogrify -path ./resized-pictures/ -resize 800x600 *.jpg

The above command will resize all the jpeg pictures in the current directory to a 800×600 size and save the output to the resized-pictures/ directory leaving the original pictures intact.

Note: You can also run the mogrify command without the -path option; in which case, all the images will be resized and overwritten in the current directory itself.

#!/bin/bash

for i in *.jpg
do

echo "I am resizing the $i image....."

# writes to a new file, the old one survives
#convert -resize 800x600 $i

# writes to the same file, the old one will vanish
mogrify -resize 800x600 $i

echo "Image $i has been resized."

done
REf:
1.http://www.devdaily.com/blog/post/linux-unix/use-imagemagick-mogrify-command-resize-images
2. http://linuxandfriends.com/2009/08/10/mogrify-how-to-resize-images-from-the-command-line/

Isnin, 7 Disember 2009

View mysql user


To show the users in a MySQL database, first login as an administrative user, then run this query:


Jumaat, 4 Disember 2009

Gnome Commander

Gnome Commander merupakan pengurus fail dua panel yang juga menyokong fail rangkaian seperti FTP dan SAMBA.


Untuk instalasi
sudo apt-get install gnome-commander

Khamis, 3 Disember 2009

Gnuplot


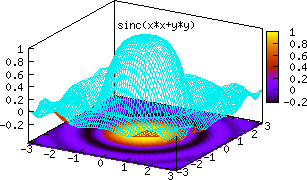
Cara yang paling mudah untuk memplot sesuatu persamaan adalah menggunakan Gnuplot

Untuk instalasi
sudo apt-get install gnuplot

Penggunaan>>Buka Terminal>>gnuplot>> plot sin(x) atau apa2 persamaan/formula yang perlu diplot

Rabu, 2 Disember 2009

Anti Virus dalam Linux


Walaupun didalam Linux boleh dikatakan tiada virus namun antivirus perlu untuk mengimbas thumbdrive yang dijangkiti virus semasa kita menggunkan windows.

Clamtk boleh digunakan untuk mengimbas virus jika anda menggunakan Linux.

Isnin, 30 November 2009

Start/Stop Services dalam Ubuntu 9.10

Dengan GUI / Graphic guna BootUp-Manager

install >> sudo apt-get install bum
Untuk run>>System >> Administration >> BootUp-Manager

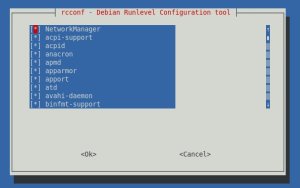
Untuk TUI/ Terminal guna rcconf

Untuk install >> sudo apt-get install rcconf
Untuk run>>Buka terminal >> sudo rcconf

Ahad, 1 November 2009

Addon Virtualbox untuk Fedora 12

Perlukan instalasi kernel-headers dan kernel-devel


Jumaat, 2 Oktober 2009

LAMP server dalam Ubuntu Desktop


Untuk instalasi LAMP server dalam Ubuntu desktop dengan cara yang lebih mudah sila gunakan tasksel.

Buka terminal--> sudo tasksel --> Pilih LAMP server

selain itu apt-get juga bolah digunakan.

sudo apt-get install lamp-server^ . Jangan lupa tanda caret (^). Ia memang perlu.

Selasa, 15 September 2009

VirtualBox VM percuma dari SUN


Sun Microsystems, Inc. memberikan kita perisian virtualization secara percuma yang dinamakan VitualBox

Boleh didapati untuk pelbagai OS seperti Windows (NT 4.0, 2000, XP, Server 2003, Vista, Windows 7), DOS/Windows 3.x, Linux (2.4 and 2.6), Solaris and OpenSolaris, and OpenBSD.

Khamis, 20 Ogos 2009

Virus Versi Baru

Virus-virus versi baru tidak lagi menyerang OS komputer. Serangan virus lebih tertumpu pada antara muka web dan browser plugin. Serangan boleh berlaku walaupun anda melayari web yang sah seperti web akhbar dalam talian dan sebagainya.

Selasa, 22 Julai 2008

Ada tak Microsoft Office dalam Linux?


Saya telah ditanya oleh seorang pengguna Windows yang ingin bertukar kepada Linux.
"Ada tak Word, Excel dan Powerpoint dalam Linux?".
Jawapannya mudah, "TIADA! Tak ada!"
Dia tanya saya lagi. "Kenapa tak ada?" .
Saya jawab" Sebab Microsoft tak buat Linux dan dia tak mau Linux menjadi saingannya".
Dia balas balik"Kalau cam tu, camne nak taip surat dan buat pengiraan guna 'excel' "

Dalam Linux, ada macam-macam "word" dan "excel" tapi namanya dah tentulah bukan Word atau Excel.

Word dalam Linux mungkin dipanggl OpenOffice Writer, KWord atau Abiword


Excel pulak mungkin dipanggil OpenOffice Calc , KSpreadsheet atau Gnumeric


Dalam Windows ada Microsoft Office ( Word, Excel, PowerPoint dan Access). Dalam Linux ada OpenOffice (Writer, Calc, Impress dan Base). OpenOffice juga mempunyai Windows version jadi kalau nak cuba OpenOffice dalam Windows download je kat http://www.openoffice.org

Selain tu, OpenOffice juga boleh membuka dan mengedit fail Microsoft Office(Word, Excel dan PowerPoint). Jadi anda tak perlu risau kalau dapat fail Microsoft Office dan semua fail lama anda masih boleh digunakan didalam Linux.

Untuk mengetahui lebih lanjut tentang perisan gantian versi Windows didalam Linux sila lihat di The Linux Equivalent Project dan Alternatives to Windows Software.

Selamat mencuba.

Sabtu, 24 Mei 2008

Perisian Waktu Solat

Untuk Window memang dah banyak... budak2 Melayu pun ada tulis "software" waktu Solat ni...cari je kat Google...

Tapi dalam Linux plak tak banyak ... semalam saya baru jumpa satu! Itu pun kira kebetulan masa install perisian al-Quran tu (zekr).


Kalau anda guna Ubuntu / Debian dan dah setkan repo Ubuntume macam yang saya bincang dalam Al-Quran Online 2. Bagi je arahan sudo apt-get install minbar

Ahad, 23 Mac 2008

Al-Quran Online - 2

Quran Online yang saya bincangkan sebelum ini memerlukan sambungan Internet. Jika anda tidak mempunyai sambungan Internet anda boleh menggunkan perisian Zekr. Ia merupakan perisian Al-Quran yang menyokong pelbagai platform seperti Linux, Microsoft Windows and Apple Macintosh.

Antaramukanya boleh monyokong pelbagai bahasa termasuk bahasa Melayu. Pemasangan asas tidak menyertakan terjemahan al-Quran dalam bahasa Melayu. Anda perlu memuat turun fail tersebut dari resources page dan mengambil terjemahan Bahasa Indonesia kerana tiada terjemahan dalam bahasa Melayu. Mungkin Yayasan Restu yang membuat terjemahan Al-Quran dalam bahasa Melayu perlu memberikan bantuan!

Bagi pengguna Ubuntu linux atau Debian anda cuma perlu memasukkan repo tersebut didalam /etc/apt/sources.list iaitu

deb http://www.ubuntume.com/repository feisty main.

Kemudian anda boleh memberikan arahan sudo apt-get install zekr didalam terminal.